Right now I'm baking a cheesecake for Thanksgiving, which made me think, why they hell am I spending 4 hours making a cheesecake? I could have made a no bake cream cheese pie in 15 minutes and spent the rest of the evening whipping my husband at phase 10. Don't make the same mistakes I did kids, below is a plan for the perfect holiday dessert.
When I was a kid my Grandma used to make these Strawberry cream cheese pies for most every holiday. For many years, I thought they were cheesecakes, and find that I still prefer them over cheesecake for a variety of reasons. First, they are super easy to make, and only require a few ingredients. Second, you don't have to bake them, which makes them the ideal pie for summer birthdays and winter holidays alike. Finally, you can mix and match crust and topping options to please whatever crowd you're serving.
The Crust:
You can always purchase a graham cracker crust, and I admittedly do this from time to time. If it's just plain graham cracker, you can't beat the simplicity. If you wanna get wild though, you can run just about any crunchy cookie through a food processor until it's in crumb form, then mix it with some butter and sugar to make a crust. My personal favorites for crusts are Gingersnaps and Famous chocolate wafer cookies (which are like Oreos without the cream).
To make a crust, mix together 1 3/4 cup cookie crumbs, 1/4 cup sugar and 6-8 tbsp melted butter. Mix together then press into a pie pan. To set the crust, bake at 350 for about 10 minutes. Let it cool for about 20 minutes before filling.
The Filling:
This is the one part you can't compromise on. It's essential that the measurements are exact, otherwise the filling won't set and you will have a sloppy pie.
You will need:
1- 8oz package of cream cheese, softened to room temperature.
14oz can of sweetened condensed milk
1/3 cup lemon juice
1 tsp vanilla
Beat the cream cheese until fluffy (about 2 minutes) then gradually add the sweetened condensed milk. Beat until smooth (another 2 minutes usually does it). Slowly add in lemon juice and vanilla, until combined. Pour into pie crust and smooth, then let it sit in the fridge for 4 hours to set.
The Topping:
Fruit is going to be the most popular option here. My grandmother always topped it with strawberries, which we would soak in sugar, then cook down and thicken with cornstarch to make a syrup. If you're in a hurry, this is a great time to use a can of pie cherries. Blueberries go great as well, as they blend nicely with the subtle lemon flavor in the filling. If you're doing a gingersnap crust, might I suggest some apple pie filling, or baked apples sprinkled with cinnamon. If you go for a chocolate crust, a crumble of chopped cookies and walnuts drizzled with caramel simulates a turtle cheesecake. The options are endless here.
Surely many of you will read this recipe and find that it sounds familiar. That is because for the better part of the century Eagle brand sweetened condensed milk has printed this recipe on the inside of it's can labels. I haven't seen it there in a long time, but a similar version appears on Eagle's website.
Wednesday, November 23, 2011
Saturday, October 29, 2011
Pumpkin Cakes!
Need a last minute recipe for a Halloween potluck? These are my all time favorite Pumpkin spice cakes! Combine with a cinnamon spiked cream cheese frosting for a perfect pumpkin pairing.
This recipe is about as simple as they come and aside from the pumpkin, most of the other ingredients are probably hiding out in your cupboards as we speak....err......read.
You will need:
15oz Can-O-pumpkin
2 cups white sugar
1 cup vegetable oil
4 eggs
1 tsp vanilla
2 cups four
2tsp. baking soda
1tsp cinnamon
1/2 tsp salt
a dash of pumpkin pie spice
1. Combine the pumpkin, oil and sugar until smooth. Then add eggs one at a time, mixing each egg until combined. Finally, throw in that vanilla.
2. Mix all the dry ingredients in a separate bowl, then combine slowly into wet mixture. Mix for 2 minutes then plop the batter into your pans.
3. Bake your cakes at 350 for about 20 minutes, The cake should be a golden brown and spring back slightly when poked.
4. let the pans cool on a rack for about 10 minutes, then remove cakes from pan and cool another 20-30 before attempting to frost.
For the frosting, I whipped up a simple cream cheese and added a bit of brown sugar and some cinnamon. Here's what I used:
2- 8oz packages of cream cheese, softened
1/2 cup butter, also soft
2 cups confectioners sugar (that's powdered yo)
1 tsp. vanilla
1/4 cup brown sugar
1 tsp. lemon juice
1 tbsp. cinnamon (Use less if yours is fresh ground or higher quality than the generic stuff I used)
1. Cream your butter, cream cheese, vanilla, lemon and brown sugar
2. Add in the confectioners sugar until nice and smooth.
3. Shake in your cinnamon and do a taste test!
Keep in mind, cream cheese frosting is not going to hold up a shape as well as a buttercream. So don't set your heart on making a nice swirly pattern on top of each cake. The frosting will just "relax" into a less prominent swirly pattern. It still looks pretty tinted and sprinkled, and I can promise you it will be much more delicious.

Sunday, October 23, 2011
The Sunday Simmer
One of my favorite things about Fall is hanging out at home, while a big pot of something delicious simmers on the stove. I love the way it makes the whole house feel warm and cozy and fills the room up with the savory scent of whatever I'm cooking.
Today, we happen to be cooking a family favorite! Spaghetti!
Side Note: Does anyone else think it's weird that we refer to this dish by the name of the noodle, when really it's all about the sauce? It's a little late to change the name and all, but in my house I like to think of it as red gravy, as the Italians would.
Back to the subject at hand: It seems like most people have a family recipe for marinara, or spaghetti sauce or red gravy. I didn't growing up, my parents would just throw some Prego in a pan and add a bit of onion and garlic powder. It was always thin and watery and didn't stick to the noodles like I wanted it to. So as I got older I began experimenting with my recipe and realized it's all about what you use as a base. I always thought it was the meat that made the sauce thick, but over time i've come to realize that it's much more than that.
So, I'm going to share with you my sauce recipe. Don't be scared by all the vegetables, they are what makes the sauce thick and savory and tasty! Just get out your food processor and trust me.
You will need:
Extra virgin olive oil.
half an onion
2-3 celery stalks
3-4 cloves of garlic
5-6 sweet peppers. Red, orange or yellow will work.
1 pound ground meat (use whatever you prefer)
2- 26 ounce cans of tomato sauce (give or take a few ounces)
1. Clean your veggies as you normally would and remove stems, leaves and other inedible parts. Keep in mind, you can also use carrots and zucchini in this recipe if you wish.
2. Get your big soup pot out and put it on the stove over medium heat. Put a few tablespoons of olive oil in the pan and let it start heating up. I start by pressing my garlic in the pan. While that cooks, I start sending my veggies through the food processor.
3. Starting with the onion, cut it into chunks and put it in the food processor. You will want to "pulse" until it's somewhere in between being chopped and pureed. Throw the onion in the pan with the garlic and oil. Next I do the celery, then the sweet peppers, seed and all. Once all your veggies are in the pan you will want to let them sauté for about 15 minutes. I season with pepper, a dash of salt and some chopped basil, then add a pound of ground turkey, or sausage or beef or elk if your feeling wild. Let the veggies and the meat simmer together till they know each other real well--about 10 minutes.
4. Once your meat's cooked through you will add your sauce. You can use plain old canned tomato sauce, or you can blend up some whole canned tomatoes, or even a jar of basic marinara sauce. I always use the Hunt's brand plain pasta sauce. Once you've stirred in your sauce, bring the mixture to a simmer and cover. Reduce the heat to low, so that it simmers ever so gently and leave it be for an hour or so.
After about 15 minutes I recommend tasting the sauce. The meat and vegetables add a lot of flavor, so be careful not to over season. It won't need more than a pinch or two of salt.
The rest is up to you! Choose your noodle, toast some garlic bread and enjoy!
You may have noticed this recipe makes a lot of sauce. I always make extra so that I can freeze half for a quick dinner. It's super easy to re-heat, just let it thaw in the fridge, throw it in a pan and let it simmer back to life.
Monday, October 17, 2011
I loaf Monday's
First of all, sincere apologies to the 10 people who actually enjoy my blog. A near death experience and starting a new job have kept me from posting as often as I should be, and I resolve to....resolve that. So here we go loaf lovers!
It's squash season! I think 90% of people cringe when hearing the word "squash" and I don't blame them, because these tasty tube shaped veggies are often ill-prepared. Luckily, I have found that there is no better way to introduce zucchini to a veggie weary pal than to bake it up into a nice loaf of zucchini bread!
Forgive me as I get a little nostalgic, but this recipe started from a copy of The Good Housekeeping Illustrated home cookbook, circa 1970's. I learned to bake because we had a garden that only produced zucchini for whatever reason. It only took a few weeks to realize that we would not be able to pawn off the 20+ a week that were ripening in our garden, so i would bake them into bread and give the loaves to friends and neighbors. I tweaked the recipe, removing the nuts and adding lemon, vanilla, cinnamon and nutmeg to round out the flavor. This bread is light and airy and perfect for breakfast or an afternoon snack.
Zucchini Bread:
3 cups all purpose flour.
1 1/2 cups sugar
4 1/2 tsp double acting baking powder
1 tsp salt
4 eggs
2/3 cups oil
2 cups grated zucchini
1 tbsp lemon juice
A few shakes of ginger, nutmeg and cinnamon.
1 tsp vanilla
1- Pre-heat oven to 350 and grease 2 loaf pans....or one loaf pan and a mini loaf pan, or muffin tin. I would advise you to bake the mini loaf or muffins separate as they obviously will cook faster and you don't want to disrupt your loaf by opening the oven.
2- In a large bowl mix flour, sugar, salt and baking powder. shake in ginger, nutmeg and cinnamon an stir until fully combined.
3- Beat eggs and mix in zucchini, add vanilla, oil and lemon juice.
4- Stir liquid mixture into flour mixture until just combined. Seriously, if you over mix it, you will ruin it!! Spread evenly into pans.
5- Bake bread for one hour. Let cool on wire rack for 10 minutes then pop the loaves out and cool on rack for another 15 minutes or until cool.
Enjoy my friends, and don't forget, I loaf you :)
Tuesday, July 5, 2011
BBQ leftovers, my mealtime Bff
I love leftovers, in fact I have been known to throw a few extra drumsticks on the BBQ in preparation for the next nights dinner. It's an easy shortcut and will help with weekly meal planning. Here are a few of my favorite tricks.
Brats and sausages: These are great for making a morning scramble, a classic quiche or even a nice brinner. To start, slice your brats into coins or chop into small pieces. Mix into some scrambled eggs and throw in a pan. If I have some, I like to mix in some chopped peppers, onion and mushroom too. Serve on top of toast or a pile of hash browns and you have a quick, tasty breakfast.
Chicken: First off, I have found that bone in chicken is much more versatile for leftovers because the bone adds flavor and holds in moisture. You can get some pretty awesome deals on family packs of drumsticks, thighs and breasts. I like to have my husband BBQ these up, or I will do a simple oven roast. For the second meal, I like to pull all the meat off the bone. If we want something spicy I will simmer the chicken for about 30 minutes in a mixture of 1/2 cup water, 1 tbsp red pepper, salt and pepper to taste, 1 tsp cumin and a few dashes of hot sauce. This spicy chicken breaks down into a "pulled chicken" which is great for tacos, burritos, sandwiches and nachos!
Ham: I really hate ham, but we always seem to end up with pounds of this stuff after Easter and Christmas. I can't stand to waste food so my go to is to make a nice split pea or bean soup out of the stuff. If I don't have time to soak the beans overnight and let the soup simmer all day, I chop it up and make a classic quiche! Just line a pie pan with a simple crust (I actually go store bought on the crust) mix together the chopped ham, some diced green chilies, 1 cup milk, 4-6 eggs and about a cup of shredded cheese. Throw it in the pie crust and bake at 350 for about 30-40 minutes.
Tuesday, June 21, 2011
Choco-minty goodness!
I made these Mint-chocoate brownies because a friend insisted that they were the best. I don't usually care too much for minty-chocolaty things, but I figured these could change my mind.
Currently it's been 27 hours since my last brownie. I assure you if it was even mildly appropriate to call in sick so that I could stay home and make another batch, I would. They were so good, that I completely forgot to take a picture of them so you could see how good they look.
The key is the brownie, which is dense and fudge like. The mint layer that goes on top is just the right amount of minty to work in contrast with the chocolate. The two layers blend together seamlessly, creating a smooth balance of sweetness.
I suggest to you strongly that you bake the brownie the night before. It needs to settle in a way that takes more than a few hours of cooling.
The Brownie is simple to make, you will need:
1 cup sugar
1/2 cup softened butter
4 eggs
1 cup flour
1 1/2 cups Hershey's chocolate syrup
Turn your oven to 350 while you blend all your ingredients, starting with the butter and sugar then working in the eggs one at a time. Mix in the flour, and once fully combined start adding the chocolate syrup in. Once everything is mixed spread into a 13x 9 pan and bake for 25-30 minutes. It will look a little damp because of the syrup, just make sure the cake is set (not jiggly).
Allow the brownie to cool overnight.
The mint mix is super simple to whip up. You will need:
2 cups powdered sugar
1/2 cup soft butter
1 tbsp water
1/2 tsp. mint extract
Whip the mint, water and butter together till smooth then slowly add in the powdered sugar. The mixture should be smooth and creamy. You can add a few drops of green food coloring if you would like. Spread the mint mixture evenly on top of the brownie.
Melt a few chocolate chips in the microwave or over a double boiler then drop small dollops of the melted chocolate across the top of the mint to make a nice swirl pattern.
I let the completed brownies chill in the fridge for a few hours, so that the layers can get to know each other. From there, it's just cut, serve and enjoy my friends.
I plan on making another batch soon, and will post pictures as soon as I can. Special thanks to Mrs. Mama McFadden for giving me this recipe.
Tuesday, June 14, 2011
The Perfect Rack
The other day we were at a restaurant and I could not help but notice that half a rack of baby back ribs will run you about $18. For that price, you could get 2 full racks and roast those babies at home! The trick to perfect ribs at home is to start with a dry rub, then to cook them nice and slow.
The night before cooking I rub my ribs down with my custom dry rub mixture, then wrap them up to marinate. The dry rub helps to lock in moisture while the spices penetrate the meat, making it nice and tender. You can use a packaged rub, but I prefer to make my own.
Nikee's Dry Rub: (enough for one rack)
1/4 cup chili powder
1 Tbsp black pepper
1 Tbsp. garlic salt
1 Tbsp. cumin
1 Tbsp. chipotle chili powder
1 Tbsp. smoked paprika
1/4 cup brown sugar
1 Tbsp. onion powder
You can always customize your rub to fit your tastes. Mine is spicy and smokey. A little ground mustard, some old bay seasoning, basil and oregano all make good additions.
When it comes time to cook your ribs, line your large roasting pan with foil. This will make clean up super easy.
I throw my ribs in the pan and cook at 250 for about 2 1/2 hours. Make sure you place them meat side up, bone side down. The last 30 minutes or so you can swipe on a traditional BBQ sauce just don't over-do it. There is a lot of flavor already packed into those ribs from the dry rub. If all goes well your finished product should look like this:

Tuesday, June 7, 2011
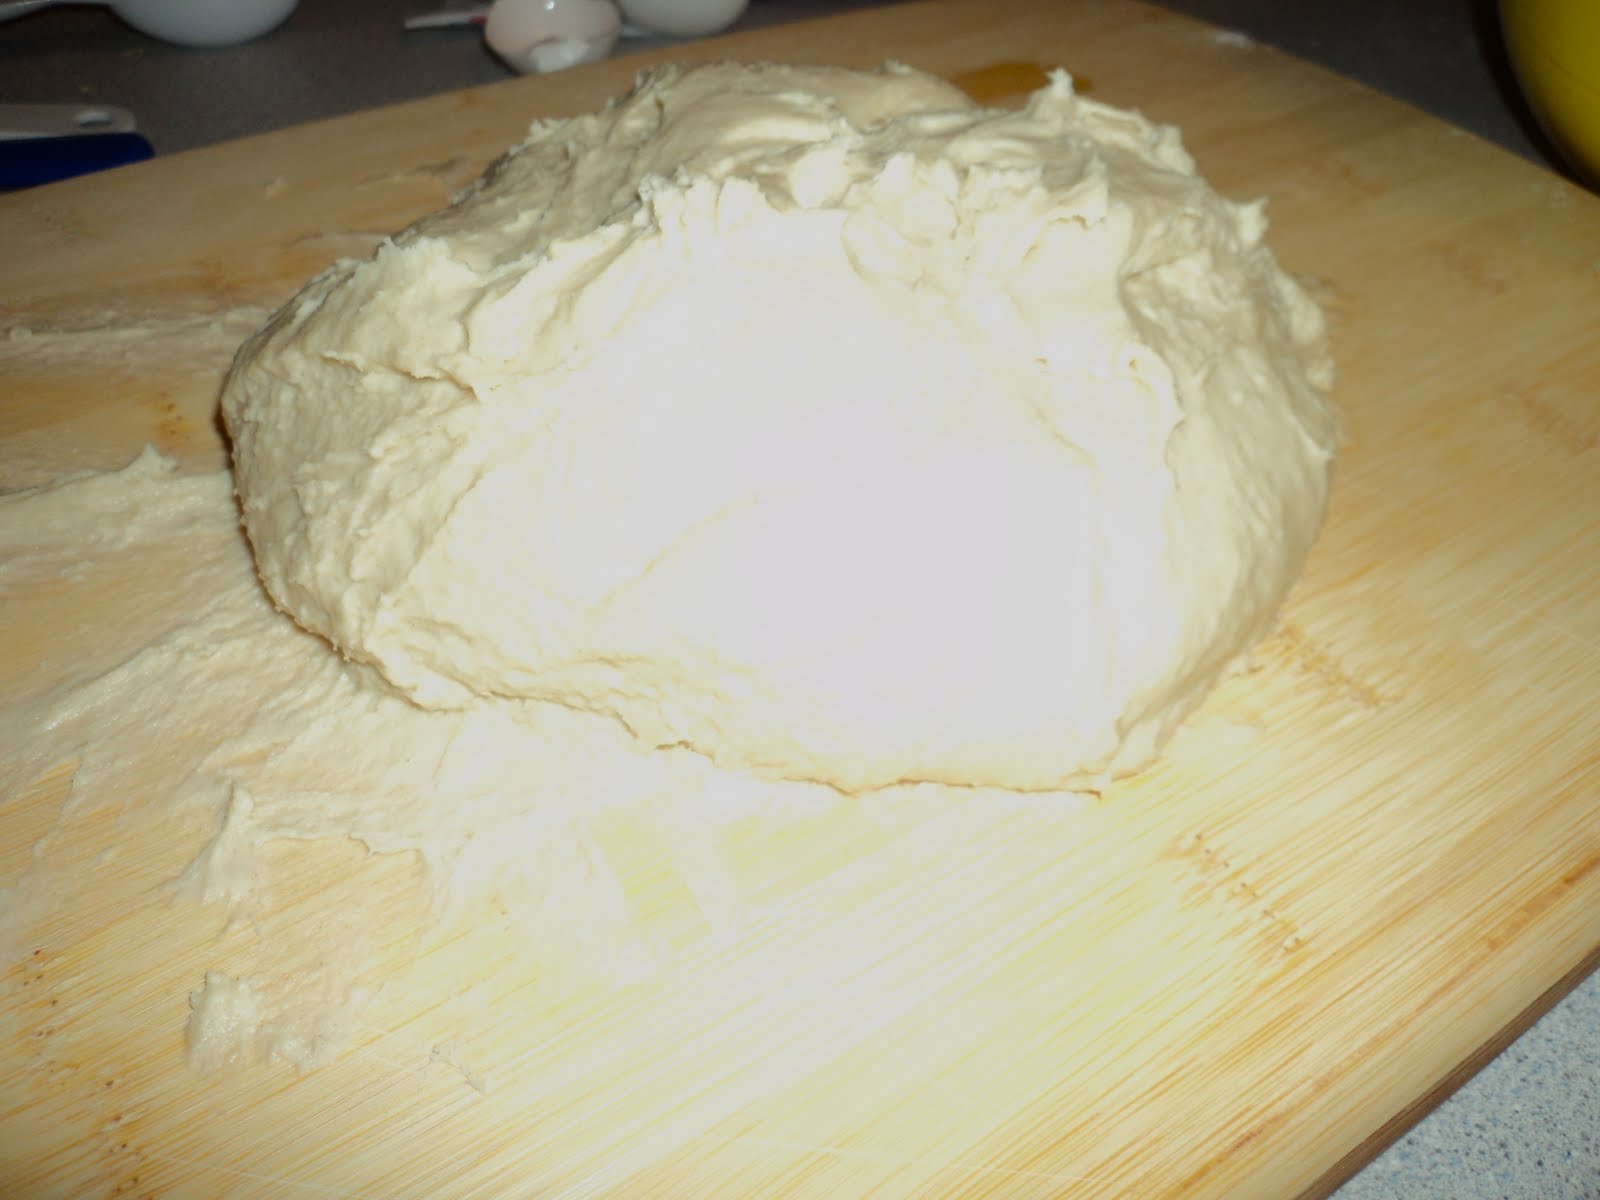
Lady Food: Big Beautiful Pretzels!
Tell Auntie Anne to take the day off because I am about to show you how to make Bavarian pretzels at home. These twisted beauties are just as tasty as the ones you find at the mall, and you probably have all the ingredients to make them just sitting in your cupboards. They're simple to master and will dazzle all your friends.
Making pretzels requires your counters to be clear so that you have enough room to roll and twist. I always start with a clean kitchen, sink empty and counters wiped. You will want to have a some parchment paper or a nice big cutting board on hand to knead and form your pretzels on. You will also need a cookie sheet to bake them on.
To make the Pretzels:
1 1/2 cups lukewarm water
1 package active dry yeast (or 2 1/4 tsp.) *Yeast is super cheap and easy to work with, make it your BFF
4 1/2 cups flour
2 tbsp. brown sugar
2 tsps. table salt
1 large egg, yolk and white separated
4 tbsp. melted butter (unsalted is best)
2 tbsp baking soda
Some coarse salt to sprinkle on top
1. Start by pre-heating your oven to 400 and putting parchment paper down on your baking sheets. The parchment paper is key, i know from experience that you will not be happy if you try to skip it. In a small bowl combine your water and yeast pack, whisk then let sit for 5 minutes.
2. Normally, the ingredients are combined in a stand mixer fitted with a bread hook. I'm 24 and those cost about $300 so I do it the old fashioned way and mix it by hand, or for about $7 you can get an old fashioned dough whisk. My recommendation to you is to do some light wrist stretches before you start, because it's a bit of a work out.
In a large bowl combine the flour, sugar and salt. In a separate bowl lightly combine the egg yolk, yeast & water mixture and melted butter. Dig a little hole in the middle of the flour mixture and pour the liquid mixture in it. I use a wooden spoon to start the stirring but at a certain point you will want to switch to using your hands. This point usually comes when the mixture starts getting sticky and all the ingredients have been fully combined. From here I lift the mound of dough out of the bowl and start kneading it on the cutting board. It's going to be a bit sticky and messy. Keep pulling and twisting the dough until it is smooth and elastic (this usually takes 7-8 minutes). Once it's reached that point, you and the dough need to rest for 5 minutes.

In a large shallow pan mix 2 cups warm water with the baking soda. On your work surface divide your dough. You can either make 6 large pretzels, or you can make 12 pretzel twists. Roll your dough out onto your work surface. For big pretzels you will want to gently roll the dough into a rope about 3 feet long. Dip your rope into the baking soda mixture for 30 seconds then remove and get ready to twist.
Shape your rope into your form of choice, for twists I fold the rope in half then twist. For the standard pretzel shape, make a loop, then twist, then fold the loose ends over and press down lightly so it holds its form.
Lay your pretzels out on your parchment lined sheets. The final touch consists of mixing the egg white with a tablespoon of water. Brush your pretzel lightly with the egg mixture then top it with the coarse salt. Pop it in the oven and allow to bake for 12-15 minutes.
If you want to get creative, you can wrap one of those ropes around a pre-cooked polish sausage, bake and serve for dinner!
You can also enhance your twists with pepperoni, a sprinkle of cheese, or a simple crumb topping (use the one from the Nanner muffins recipe). Wanna get really fancy? Use chopped nuts and toffee. Top, then bake!
Oh and don't forget the dips! In my house the favorites are mustard, chocolate syrup, and con queso!

Not the prettiest pretzel shape i've ever made, but it sure was tasty!
Making pretzels requires your counters to be clear so that you have enough room to roll and twist. I always start with a clean kitchen, sink empty and counters wiped. You will want to have a some parchment paper or a nice big cutting board on hand to knead and form your pretzels on. You will also need a cookie sheet to bake them on.
To make the Pretzels:
1 1/2 cups lukewarm water
1 package active dry yeast (or 2 1/4 tsp.) *Yeast is super cheap and easy to work with, make it your BFF
4 1/2 cups flour
2 tbsp. brown sugar
2 tsps. table salt
1 large egg, yolk and white separated
4 tbsp. melted butter (unsalted is best)
2 tbsp baking soda
Some coarse salt to sprinkle on top
1. Start by pre-heating your oven to 400 and putting parchment paper down on your baking sheets. The parchment paper is key, i know from experience that you will not be happy if you try to skip it. In a small bowl combine your water and yeast pack, whisk then let sit for 5 minutes.
2. Normally, the ingredients are combined in a stand mixer fitted with a bread hook. I'm 24 and those cost about $300 so I do it the old fashioned way and mix it by hand, or for about $7 you can get an old fashioned dough whisk. My recommendation to you is to do some light wrist stretches before you start, because it's a bit of a work out.
In a large bowl combine the flour, sugar and salt. In a separate bowl lightly combine the egg yolk, yeast & water mixture and melted butter. Dig a little hole in the middle of the flour mixture and pour the liquid mixture in it. I use a wooden spoon to start the stirring but at a certain point you will want to switch to using your hands. This point usually comes when the mixture starts getting sticky and all the ingredients have been fully combined. From here I lift the mound of dough out of the bowl and start kneading it on the cutting board. It's going to be a bit sticky and messy. Keep pulling and twisting the dough until it is smooth and elastic (this usually takes 7-8 minutes). Once it's reached that point, you and the dough need to rest for 5 minutes.
In a large shallow pan mix 2 cups warm water with the baking soda. On your work surface divide your dough. You can either make 6 large pretzels, or you can make 12 pretzel twists. Roll your dough out onto your work surface. For big pretzels you will want to gently roll the dough into a rope about 3 feet long. Dip your rope into the baking soda mixture for 30 seconds then remove and get ready to twist.
Shape your rope into your form of choice, for twists I fold the rope in half then twist. For the standard pretzel shape, make a loop, then twist, then fold the loose ends over and press down lightly so it holds its form.
Lay your pretzels out on your parchment lined sheets. The final touch consists of mixing the egg white with a tablespoon of water. Brush your pretzel lightly with the egg mixture then top it with the coarse salt. Pop it in the oven and allow to bake for 12-15 minutes.
If you want to get creative, you can wrap one of those ropes around a pre-cooked polish sausage, bake and serve for dinner!
You can also enhance your twists with pepperoni, a sprinkle of cheese, or a simple crumb topping (use the one from the Nanner muffins recipe). Wanna get really fancy? Use chopped nuts and toffee. Top, then bake!
Oh and don't forget the dips! In my house the favorites are mustard, chocolate syrup, and con queso!

Not the prettiest pretzel shape i've ever made, but it sure was tasty!
Tuesday, May 31, 2011
Lady Food: It's Brinner time!
Nothing beats coming home from a long day at work and diving into a pile of syrupy flapjacks, am I right ladies? Course if you're like me you might get a little hung up on the massive amounts of calories in those pancakes, then theres the bacon....and the eggs. The last thing I want is to feel like I'm missing out on my favorite brinner treats, so I have come up with some great alternatives to the traditional oil fried elements we encounter when making breakfast for dinner.
 The Hash Browns:
2-3 washed and peeled potatoes
1 onion
2 peppers, one green and one red.
a pinch of salt and pepper, and some extra virgin olive oil, or cooking spray.
I think most people only know hash browns as those ice crystal coated shreds we plop into a pan of oil and cover with ketchup. I'm about to rock your world though, cause you know what? They are actually potatoes. So get yourself out of the freezer aisle and grab some fresh potatoes (I like the red ones), an onion and some red and green peppers. It's super easy to make your own hash browns at home, and adding flavor elements like onion and pepper will cut down the amount of salt and sauce you put on them.
1. Take 2-3 peeled potatoes and a cheese grater and start shredding! It's quick work and when you're done you should have a mound of shreds which you will notice, are quite moist.
2. Using cheesecloth or some double layered thick paper towels, load your mound of potatoes shreds onto the cloth and bundle it up and give it a squeeze. You want to squeeze out as much of the starchy water as possible.
3. Using a fine grater, shred in some small bits of onion and red and green peppers. Size matters here because if the bits are too big they won't cook as evenly as the potatoes. I like to put in a quarter cup of peppers and onion for every 2 cups of potatoes.
4. Mix your potatoes shreds with your onions and pepper bits and drop them into a pan that has been lightly greased and is at a medium heat. Let your hash browns cook for about 7 minutes, then flip them and season lightly with some salt and black pepper. Let them cook on the other side for another 7 minutes. They should be golden brown when you plop them on your plate!
Let's Talk Bacon:
My husband loves thick cut, peppery slabs of bacon with his brinner. I just can't stand it. The good news is there are so many great substitutes for bacon now!! My personal favorite is turkey bacon! Sure the sodium levels aren't that much better but turkey bacon has less fat and it's just as satisfying. You can buy it thick cut, thin cut, and peppered. I prefer the flavor because it's not nearly as greasy and crisps up to perfection.
Then we have the meatless options. I'm not gonna lie, I love the Morningstar farms bacon substitutes. These strips are smokey and crunchy and tasty. They also make sausage patties and crumbles which are great for a breakfast burrito or throwing into a quiche.
If you want to take it a step further, forget the bacon and make yourself some smoked salmon or a nice piece of lean ham. Both go great with hash browns and eggs.
Meet your new best friend: The Crepe
So when it comes to the breakfast carb we have so many options. The pancake, the waffle, the biscuit and good old french toast. All tasty, but so heavy. Well I want to introduce you to one of my personal favorites that will leave you feeling full and satisfied without feeling yucky.
Crepes are airy and easy to whip up. They cook quick and you probably have these ingredients already in the pantry. I like to fill mine with fresh fruit, or a sprinkle of sugar and a squirt of lemon juice. You can also smear on some jelly or even a bit of peanut butter.
To whip up your crepes you're going to need:
1 cup flour
2 eggs
1/2 cup milk
1/2 cup water
1/4 tsp salt
2 tbsp. melted butter
Whip your eggs and flour together while adding in your water and milk. Finish off with the salt and melted butter. As always, resist the urge to over mix! You will want to heat your medium sized frying pan over medium heat and grease it ever so lightly.
Drop a 1/4 cup of batter into your pan and start to tilt and swirl gently so that the batter coats the surface evenly. Let it cook for 2 minutes, then flip and let the other side cook. Fill with fruit, roll them up and snack away!
Well ladies I wish you the best on your brinner adventures!
Sunday, May 29, 2011
Sunday Muffins, Nanner style.
The weekend is always reserved for baking in my house, especially since I hit the jackpot and started taking home the over-ripe bananas from work.
These "nanner muffins" are just about the only breakfast baked good that will make my husband forget about those stupid preservative pumped hockey pucks from Costco. This recipe will actually work as a bread, or in a mini-loaf pan. I do the muffins cause they are easy to pack up and they freeze pretty well.

You'll want to pre-heat your over to 375 and either grease you pans or line them with muffin papers.
Mix the following dry goods together in a small bowl:
1 1/2 cups all purpose flour
1 tsp. Baking Soda
1 tsp Baking powder
1/8 tsp nutmeg
Meanwhile, in a large bowl you will want to blend the following:
3-5 bananas, mashed
3/4 white sugar
1 egg, lightly beaten
1/3 cup butter, softened or melted.
1 tsp. vanilla
Once you have your wet ingredients all set, you can incorporate the dry mixture in. Stir until just incorporated. No need to over blend!
I use a 1/4 cup measuring cup to drop my batter into my muffin pans. Make sure you leave a little room on top for the crumb toping.
I always put a little crumb topping on my muffins. it bakes into the top and gives it a spicy sweet crunch but won't fall off all over the place when you try to eat them.
For the crumb, mix these dry ingredients together:
1/3 cup brown sugar
2 tbsp flour
1/8 tsp cinnamon
1/8 tsp pumpkin pie spice
Cut 1 tbsp. cold butter in using a fork. Keep mashing until it's course and crumbly then top the muffins with it.
Throw those babies in the oven and check'em in 18-20. The crumb should be melted and the muffin golden brown. Use the old toothpick trick if your not sure if there done yet.
Make sure you have a cold glass of milk on hand and start munching after they've cooled in the pan for a few minutes.
Subscribe to:
Comments (Atom)